
Special Price
$196.72
Regular Price
$212.95
Out of stock
Available Quantity:
0
SKU
316557205
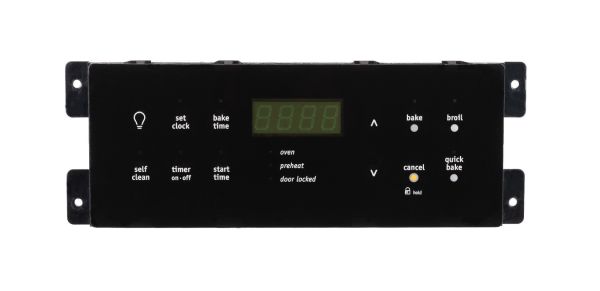
The Frigidaire 316557205 Range Electronic Clock/Timer Control Board is responsible for the accurate time display and the regulation of the cooking cycles. It controls oven functions by receiving and interpreting inputs from the user and then commands heating coils. The display is dynamic and real-time, and internal circuits are used to keep time. This control board also increases the level of control when cooking and avoiding overcooking.
Manufacturer

✓ This Product Replaces:
316418305, 316452305
This Part Fits the Following Models (231)
Frigidaire GLEFM385DQB Freestanding Electric Range
Frigidaire GLEF384HSB Range
Frigidaire GLEF384HSA Range
Frigidaire GLEF384HQB Range
Frigidaire GLEF384GBA Freestanding Electric Range
Frigidaire GLEF384GSA Freestanding Electric Range
Frigidaire GLEF384GQA Freestanding Electric Range
Frigidaire GLEF384HBA Range
Frigidaire GLEF384HQA Range
Frigidaire GLEF384HBB Range
Frigidaire GLEFM386FCA Freestanding Electric Range
Frigidaire GLEFM385DSJ Freestanding Electric Range
Frigidaire GLEFM385DSH Freestanding Electric Range
Frigidaire GLEFM385DSG Freestanding Electric Range
Frigidaire GLEFM386FCC Freestanding Electric Range
Showing 1-15
of 231
| Manufacturer Name: FRIGIDAIRE Product Number: 316557205 OEM Part Number: 316557205 Product Description: Clock/Timer |
Choose the best Home Appliance parts and supplies from HnKParts!
Same Day Shipping
Best Quality And Best Price
Wide Range of Inventory
Best Customer Service
Have More Questions or Need Help to Place The Order?
Reach us at (866)723-0907 or [email protected]
Write Your Own Review
Customer Questions
Installation Steps
Step1: Turn off power range at breaker and unplug unit to prevent shock.
Step2: Remove control panel screws and access the electronic control board.
Step3: Note wiring harness connections for correct reassembly.
Step4: Carefully disconnect all connectors, avoiding static discharge damage.
Step5: Install new board and reconnect all harnesses securely.
Step6: Reassemble panel and restore power, then test clock/timer operation.
