The store will not work correctly in the case when cookies are disabled.
We collect user information to provide a better user experience and protect the security of our website. By continuing to use our website, you acknowledge the use of cookies.
Observance of Independence day July 4th we are closed [No shipping's and deliveries ] on 07/03/2026, Orders received after 3.00pm CST on 07/02/2026 will be shipping out on Monday 07/06/2026
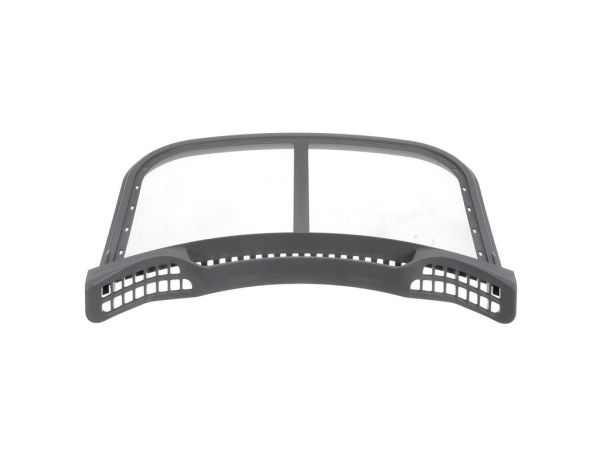
The Frigidaire 5304511512 Dryer Lint Filter used to collect lint and other particles during the dryer operation. It operate by enabling the passage of air and at the same time trapping lint to avoid blockage of the dryer vent. This is because the filter is designed in a mesh form that can capture small particle, allowing proper circulation of air and preventing overheating.
Step 1: The dryer is disconnected from its electrical supply. If needed, the dryer is shifted away from the wall to reach the rear panel.
Step 2: A Phillips-head screwdriver is utilized to take out the screws from the dryer’s back panel. The screws are stored in a secure location.
Step 3: The rear panel is removed to access the lint filter. This filter is typically situated close to the blower fan, located at the bottom of the unit.
Step 4: The metal clips securing the lint filter to the blower fan housing are released. Additionally, any metal springs that may be connected to the filter are detached.
Step 5: The old lint filter is set aside and the new 5304511512 Frigidaire Dryer Lint Filter is taken hold of.
Step 6: The metal clips and/or springs are affixed to the new filter, then the filter is inserted into the blower fan housing. It is confirmed that it is firmly in place.
Step 7: The back panel is reattached and it is fastened using the screws.
Step 8: The dryer is reconnected to the power supply and it is verified that the filter is functioning properly.
Please note that these instructions are served as general guidance and should always be followed alongside the manufacturer's manual when available.