The store will not work correctly in the case when cookies are disabled.
We collect user information to provide a better user experience and protect the security of our website. By continuing to use our website, you acknowledge the use of cookies.
Observance of Independence day July 4th we are closed [No shipping's and deliveries ] on 07/03/2026, Orders received after 3.00pm CST on 07/02/2026 will be shipping out on Monday 07/06/2026
The 
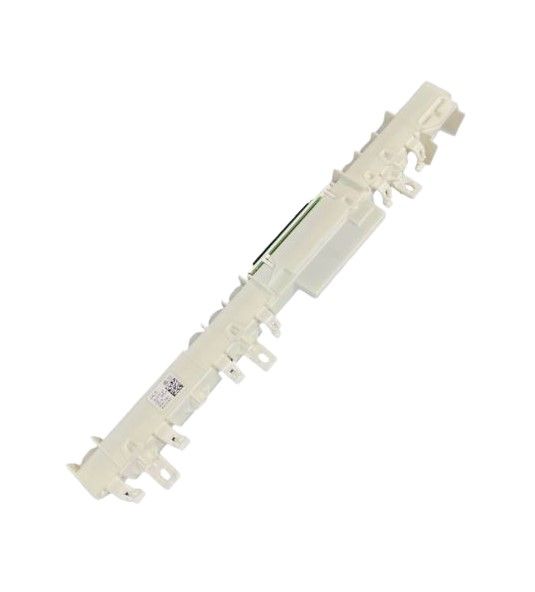
Asko 818170 User Interface Top Display DW40.2 manages control inputs and displays cycle information for programmed operation of the system. It is placed on the upper control panel, it connects to the main control board through a wiring harness and signal interface to transmit commands and receive status data. Its configuration integrates touch or button input pathways with display output segments for real-time operational input. It coordinates program selection, timing information, and status indicators during operating sequences of wash cycles, temperature regulation, and system operation flow within the control cycle processing architecture.
What maintenance is required for the Asko 818170 User Interface Top Display?
Keep the display panel clean by wiping it gently with a soft, slightly damp cloth to remove fingerprints and detergent residue. Avoid spraying cleaners directly on the interface. Ensure the machine is powered off before cleaning. Prevent moisture buildup around the control area to protect internal electronics.
What are common issues with the Asko 818170 User Interface Top Display?
Buttons are unresponsive during cycles.
Display flickers under bright light.
Error codes appear unexpectedly.
Touchpad becomes sticky over time.
Installation Steps
Step1: Unplug the dishwasher to ensure safety.
Step2: Remove the front control panel screws and gently detach the panel.
Step3: Disconnect all ribbon cables and connectors from the old display.
Step4: Align the new top display with the mounting slots.
Step5: Reconnect all cables securely to the new display.
Step6: Reattach the control panel and fasten screws.
Step7: Plug in the dishwasher and run a test cycle to confirm proper operation.