The store will not work correctly in the case when cookies are disabled.
We collect user information to provide a better user experience and protect the security of our website. By continuing to use our website, you acknowledge the use of cookies.
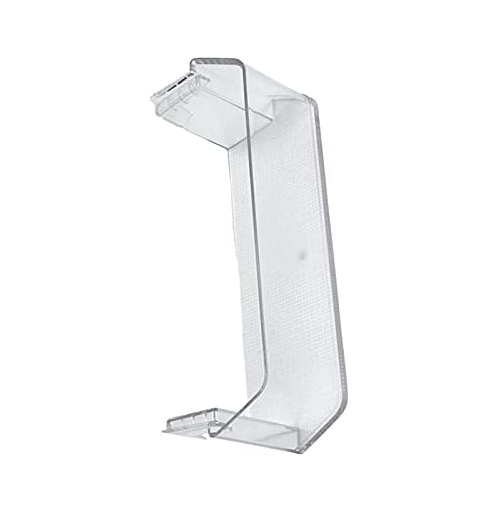
The Whirlpool W11366475 Refrigerator Door Shelf Bin securely holds bottles and containers, keeping them organized and easily accessible. It attaches firmly to the refrigerator door, providing stable storage while maximizing space. Durable plastic construction ensures long-lasting use, while its transparent design allows quick visibility of stored items. This shelf bin helps optimize storage efficiency and prevents spills by keeping items securely in place. A simple yet effective addition, it enhances convenience and organization in the refrigerator.
Step 1: Power down the unit. Prior to commencing any repairs on your appliance, it should ensure that the power is turned off or the appliance is unplugged.
Step 2: Take out the shelves. To access the refrigerator trivet, it is necessary for any shelves located inside the refrigerator to be taken out. The screws should be located and the shelves should be detached.
Step 3: Detach the current trivet. A suitable tool should be employed to detach the current trivet from the refrigerator.
Step 4: Insert the new trivet. The new trivet ought to fit seamlessly in place of the one that was taken out. It should be confirmed that it is secure before proceeding to the next phase.
Step 5: Fasten the trivet. The trivet should be fastened using the proper screws or nuts.
Step 6: Restore power. After the new trivet is firmly in place, power should be restored or the appliance should be plugged back in.
Step 7: Verify the new trivet. The new trivet should be verified to ensure it is secure and operating correctly.
Please be aware that these instructions serve as general guidance and should always be utilized alongside the manufacturer's manual, if available.