
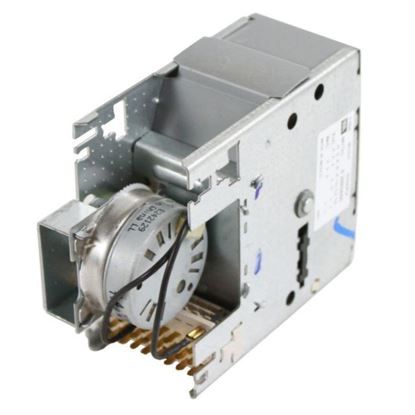
Whirlpool WP22001255 Washer Timer

Special Price $181.88 Regular Price $201.95
In stock
Available Quantity:   55
SKU
WP22001255

Product Description

The Whirlpool WP22001255-Washer Timer designed to control the time of wash, rinse, and spin cycles to ensure the clothes are washed well. Works by the transmission of signals to the various parts of the system to switch them on or off at the appropriate time. Intended for compatibility, it works well to ensure that the washer regains its normal operation. This type of timer is useful in maintaining the correct cycle time and reduces damage.
Manufacturer

✓ This Product Replaces: 22001255
https://www.hnkparts.com/media/catalog/product/w/p/wp22001255_whirlpool_hnkparts.jpg
Manufacturer Name: WHIRLPOOL
Product Number: WP22001255
OEM Part Number: WP22001255
Product Description: Timer

Choose the best Home Appliance parts and supplies from HnKParts!

  • Same Day Shipping

  • Best Quality And Best Price

  • Wide Range of Inventory

  • Best Customer Service

Have More Questions or Need Help to Place The Order?
Reach us at (866)723-0907 or [email protected]

Write Your Own Review
You're reviewing:Whirlpool WP22001255 Washer Timer
Your Rating
Customer Questions
What maintenance is required for the Whirlpool WP22001255 Timer?

Regularly inspect the washer timer for any signs of wear, corrosion, or loose connections. Keep the surrounding area dry and free of lint or debris. Ensure electrical connections are secure to prevent malfunctions and always disconnect power before handling.

What are common issues with the Whirlpool WP22001255 Timer?

  • Timer not advancing or skipping cycles.
  • Machine failing to start or stop correctly.
  • Erratic or inconsistent wash cycle durations.
  • Electrical contacts wearing out or corroding.

Installation Steps

Step1: Disconnect washer from power and shut off water supply before starting work.

Step2: Remove control panel screws and carefully lift the console housing.

Step3: Existing wire connections for reference.

Step4: Disconnect harness plugs from the old timer and release mounting clips.

Step5: Install the new timer into position and reconnect all terminals securely.

Step6: Reassemble control panel and secure screws.

Step7: Restore power and run a short cycle test to confirm proper operation.